12 November 2018

Ghouls for Sale

Among my collection of models still on sprue were some Games Workshop Crypt Ghouls. I don't really like the idea of ghouls in my vampire army (my Vampire Lord is something of an elitist) so they've been sitting unmade for some time. Since finishing a lengthy project I decided it would be nice just to bang out something quick and ghouls fitted the description. I decided to use the round bases they came with as I figured I'd flog them to an AoS player when they were done. I don't know but I imagine 10 ghouls make more of a difference in AoS than in The Ninth Age, where it'd need to be at least 30 for a unit.

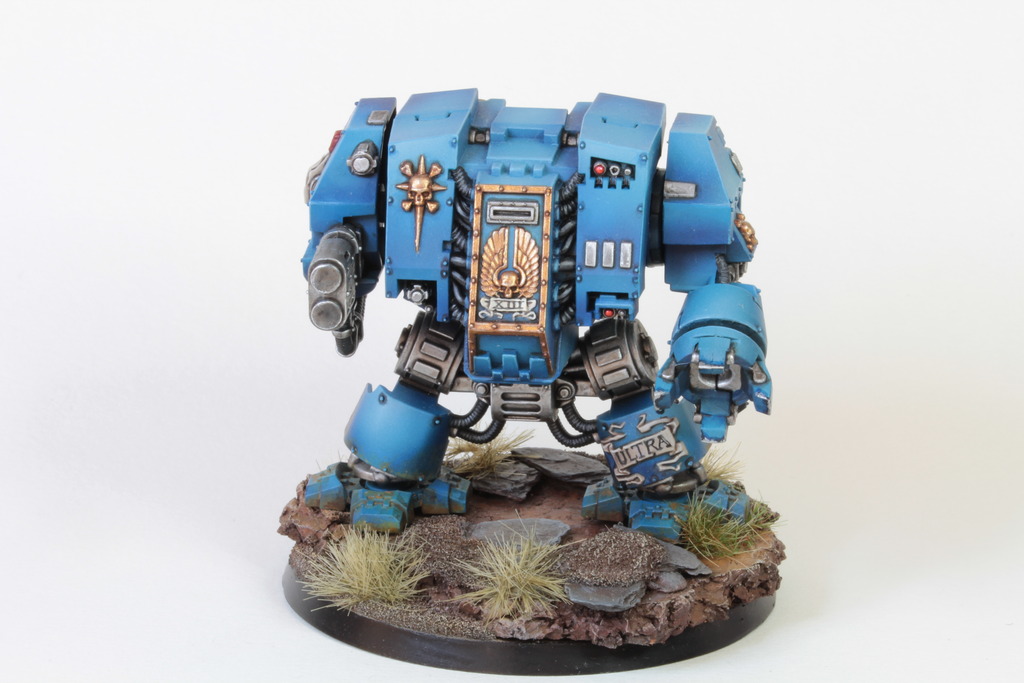
Anyway, a couple of days cursing at the models for being so annoying to put together (I really didn't see that coming, but none of the parts seem to actually fit) followed by having fun with an airbrush and washes and here they are!


For quick-and-dirty painting I am impressed with how they came out (and slightly regretting putting them on round bases). I haven't had much call to use the Blood for the Blood God technical paint before this either, which is something I will try to change in future. That paint is fun and if you're liberal with it it can hide a multitude of mistakes. At least I have some Ghast models I can try this colour scheme out on again. (My Vampire Lord will tolerate ugliness if it's in low numbers and has better combat potential.)

Until next time, happy painting!

06 November 2018

Deathmaster Snikch

It's been a long time since I really tried to push my painting ability, but a while ago I started a model with the intention of doing just that.

Well, here's the finished piece!

[EDIT - I was a bit overexcited to show you this model and took the photos in a hurry, making them more than a little overexposed in the process. I decided to take some new pics which I think are better (i.e. darker) and while I may have overcompensated some (I may have made them too dark) I think they fit much better with the theme of the model. I've decided to leave the original photos at the end of the post should you wish to see them, but the top ones are the better ones.]


OK, he's not perfect, but there's a lot of improvement on previous efforts. The silver NMM was something I really wanted to get the hang of, and a think it's fair to say I've turned a corner there. The OSL effect is something I've not done much with before but might want to think about trying in future - it was kind of fun and easier than I thought it would be.

It was also fun to paint with a lot of greys. Almost all the colours were mixed with black and white to change the tone and I think, especially with the skin, it gives a really interesting effect. Definitely something I'll try again.

In any case, it was nice to have another miniature to add to The Gallery and I've got lots of impetus to get painting more display pieces.

Until then, happy painting!


The original, overexposed photos. Still not terrible, but the other ones are better.

31 October 2018

Vampires Chapter 5: Happy Skeleton Day!

If you've been following my recent posts you'll know I've been painting up a bunch of skeletons for my Vampire Covenant army. (If you haven't been following then now's a good time to get in on the ground floor of my readership, and tell your friends you knew the blog before it got big.)

Well, it took a while but here's the finished unit!


Skeleton unit finished

And a shot of just the command rank:


Skeleton unit front rank

I'm very pleased with how they turned out.

As it takes me so long to paint stuff, I often find that my painting style and quality have changed by the time I paint a new unit for an army (or, in this case, the second half of a unit). I think with these skeletons I managed to stay very close to the original while still exploring some new things in my painting. Here I wanted to be a bit bolder with my colours, and I think the new batch of skeletons look more vivid, but not so much that they look out of place next to the older ones. Here's all 50 on a movement tray I promise to replace one day.


Skeleton unit - all 50 painted!

Together the whole unit looks cohesive, if a little hard to get all in frame.


Skeleton banner close-up

I also spent a little extra time on the banner, on which I've painted a freehand design of a vampiric skull with a ribbon of yellowed parchment. The motto on the parchment reads MORS IN VICTORIA (Latin for "Victory in Death", or so the internet tells me), although it is hard to make out as the banner is old and tattered and also I need more practise writing on models. (The skeleton banner is also way too narrow for my liking, and the curve in it made it very awkward to freehand.)

Now I need to replenish my grass tufts so I can finish basing my barrow guard and put them on the "finished" vampire shelf.

Until next time, happy Samhain!

27 October 2018

A Quick WIP

I feel like celebrating - my last post showing off some Space Wolf characters got 11 views! It's had more people clicking on it than any other post since I restarted this blog, and while I'm pretty sure one of them was me accidentally hitting the link on my phone, I'm still chuffed. Gotta make the most of little victories, guys.

The last couple of weeks have been hectic with various family members injuring themselves. I've been running around trying to make sure they don't fall over so I haven't had time to take photos of my now finished skeletons, but I do have a little WIP to share to tide you over:

Snikch Cloak WIP Back

I've had this model for ages and finally settled on some colours for him. It will also be the first display-quality model I've painted in a while - not counting my Blood Angel whose main claim to display-level was the freehand. I'm going to try to stretch my painting muscles and push myself beyond my comfort zone. Let's hope that works out.

Anyway, I'm off to celebrate with a bottle of warm milk (or however normal people celebrate). Until next time, happy painting!

19 October 2018

Vlka Fenryka - Characters

Not too long ago I shared a test model for a new colour scheme for my brother's 40k army. Well the Rout grows with the addition of two characters, also in this new colour scheme!

First up, my brother's conversion of Lukas the Trickster:


This follows the style of the test model very closely but with a little extra effort on the details, especially the face.

Next, Geigor Fell-Hand from the Burning of Prospero:


This model was supposed to be an Xmas present that I got the year the box set came out, so needless to say it was very, very late. He's also pretty different from the other two models as I was trying to keep it cleaner to make the character stand out.

Until next time, happy painting!

10 October 2018

Dem Bones Dem Bones - Possibly the Slowest Way to Paint Skeletons

Have you ever wanted to spend more time painting bone? Have you ever thought, "Jeez, drybrushing is too quick and easy - I wish I could spend even more time painting rank after rank of skeletons"? Well you're in luck. This is my recipe for painting my Vampire Covenant (also known as Ye Olde Vampire Counts) and it is one of if not the slowest way to painting such a basic model.

Just to be clear, I am not saying you should paint your skeletons this way. It is very, very time consuming, and skeletons usually come in units of forty or more, so you'll lose a lot of hours if you follow this recipe. You can achieve results just as nice in a fraction of the time by drybrushing. I just like the effect I can achieve by layering and don't mind putting in weeks of work for a core unit with no frills. I also really hate drybrushing.

I know - I'm mad. I've made my peace with it.

Anyway, this is how I do it.

(Step 0: Undercoat white. I discovered I prefer GW's white spray to airbrushing a white undercoat. For whatever reason airbrushed white undercoat wouldn't stick very well to the model.)

Step 1: Basecoat the bone in Vallejo Model Air Sand. This is the most painless step thanks to the airbrush - honestly I would get one just for basecoating models, it's such a time saver.


Step-by-step skeleton bone Step1

Step-by-step skeleton bone Step1 unit front

Step 2: Wash the whole model in Seraphim Sepia (GW), but don't let it pool to much. We're just looking to darken the crevices and give the bone some colour.


Step-by-step skeleton bone Step2

Step-by-step skeleton bone Step2 unit front


Step 3: Accentuate the deeper shadows with a wash of Agrax Earthshade (GW). Don't wash the whole model this time, just pick out the areas that need to be darker, like the eye sockets, mouth, ribcage, between the long bones of the arms and legs, and the hands and feet. Be careful not to eliminate the sepia colour from the raised parts of the bone.


Step-by-step skeleton bone Step3

Step-by-step skeleton bone Step3 unit front


Step 4: Layer Vallejo Model Dark Sand onto the raised portions. You want to avoid the deep recesses (obviously) but also leave some of the sepia around the recesses to get a gradient from dark brown through sepia to the yellow. It'll take a couple of coats, but I'm not looking for perfect coverage as I want to let some of the sepia show through the Dark Sand - especially towards the edges of where I apply this paint. I think this makes the colour more complex and pleasing to the eye.


Step-by-step skeleton bone Step4

Step-by-step skeleton bone Step4 unit front


Step 5: Highlight with a mix of Dark Sand and Ivory (both Vallejo Model colours) somewhere between 2:1 and 1:1 - I'm not too fussy about the exact ratio and I play around with it until I get an off-white colour that is clearly lighter than the Dark Sand but isn't so light that the transition looks wrong. Focus the highlights on the more raised areas. I usually do this in two coats, but as in step 4 I'm not looking for perfect coverage. The centre of the highlights should be the brightest but even here your highlight shouldn't be completely opaque - i.e. if you applied another coat of this highlight it would appear brighter, but stop before this.


Step-by-step skeleton bone Step5

Step-by-step skeleton bone Step5 unit front


The skull is the exception here - as it's the largest flat surface of bone, it needs thinner paint for highlighting and an extra coat or two to achieve a nice transition.

Step 6: Another highlight using the same paints, but this time with more Ivory - a mix somewhere around 2:1 Ivory:Dark Sand. Again, I don't worry about the exact ratio, I just pick something that's light enough but doesn't create too jarring a transition to the eye. Pick out the raised areas focusing on upper edges and the top of the skull. (Use thinner paints and a couple of extra layers for the skull.) This takes a couple of coats and, again, I'm not looking for perfect opacity. I want the previous layers to show through a little bit, especially towards the edges my highlight.


Step-by-step skeleton bone Step6

Step-by-step skeleton bone Step6 unit front

Optional step 6A: Add a few extra highlights to the face portion of the skull with an Ivory/Dark Sand mix that is close to pure Ivory just to give more emphasis. I don't have a separate photo of this as it's something I do as I go along during step 6.

And that's how I paint my skeletons, or, at least, the bone. There's still the weapons, cloth, etc. to do. I did say it was a slow process. The main reason I've stuck with this recipe (because half way through I really started to consider drybrushing) is because I have 25 skeletons already painted and wanted these guys to match. If I start another army with a lot of skeletons I probably will resort to drybrushing because this takes ages. However, it's still a really good recipe if you just have some nice bone details you want to give a bright, bleached look. My advice would be to just take a little more time and maybe add a final highlight on the very brightest points that is very close to white.

Until next time, happy painting!

02 October 2018

Blood Angel Praetor - Winner of the Irish Golden Demon!

Last Saturday the 500th Warhammer store opened in Hong Kong and I can't wait to see what shiny things are promised later this month to celebrate that - I'm a sucker for limited edition minis, provided they aren't Primaris Space Marines*. Last Saturday was also the 22nd birthday of the Games Workshop Dublin store, where I bought my first models over a decade ago**. As is tradition, there was a big party to celebrate and - having missed the last few - I was eager to attend. I was especially interested in entering the painting competition, which was ambitiously titled the Irish Golden Demon.

Irish Golden Demon is a grandiose description for a single mini painting competition featuring circa 20 entrants from among the store's regulars; nevertheless it was a lot of fun and a good opportunity for me to get back into the habit of painting well. The standard was remarkably high and chatting with the other painters I learned a few new tricks and got a fresh perspective on my painting. There's no substitute for studying well-painted models in the flesh to teach you more about what you're trying to achieve and how you can develop your own style. I just wish I'd brought a camera and had some photos of the other entrants to show you (d'oh!).

Next time I'll bring a camera. But I do have pictures of one entry - mine!


Blood Angels Praetor in Terminator Armour Front

Blood Angels Praetor in Terminator Armour Side

I started this guy a few weeks ago when I found Ferrari Red, a Vallejo Model Air paint that is just the best shade of red for Blood Angels. I was trying to develop a Blood Angel colour scheme and at the same time get my eye back into painting more than just rank and file, tabletop-ready units. He was pretty much finished two weeks before GW's birthday, but was a little more basic than I'd hoped and was sitting on my shelf staring at me as I tried to decide whether I'd call him finished or go back and add something. In the end, as I could only enter one model into the store's painting competition I decided I'd put the effort in and go for a complex freehand on the back.


Blood Angels Praetor in Terminator Armour Back Freehand

I'm so damn pleased at how this came out. It's about the best freehand I've done so far and I'm really excited to do loads more. It didn't even take as long as I thought it would. I expected to spend the two days before the competition madly trying to finish it, but it was completed in one afternoon giving me Friday to work on some other projects. I must be getting faster.

I also touched up the black cloak and added some mud to the boots because they felt a little flat and dull, but that's not as cool as a big Blood Angel symbol.

On the day of the competition the judges seemed to agree that adding the freehand was a good move, because my Blood Angel Praetor won first in the adult category! It was a very close call with a beautiful Gabriel Seth coming second (the IX legion was well-represented!) and a very well blended Slambo coming in third. We even got trophies - Primaris Dreadnoughts sprayed silver, gold, and platinum (apparently there was some difficulty achieving a bronze effect so silver became third and the silvery-looking bronze was called platinum and became first, but I'm not going to complain).


Blood Angels Praetor Winner and Trophy
He would have to pop out of his base for the photo...

This is actually the second time I've won the store's birthday painting competition, the last time being several years ago with my Tzeentch sorcerer. Both models are now living happily on my display shelf, although I will have to look into upgrading to a proper cabinet.

As this post has already been very long I'm not going to go into any detail as to how I painted anything, but next time I paint some Blood Angels (I have a few characters waiting for attention) I'll post WIP and step-by-step shots.

Until then, happy painting!

*I actually really like the Primaris Marines, I just don't want to buy any because they'll make all my regular marine characters look small.
**Some metal Ushabti and Liche Priests, way back when metal blisters were a thing.

20 September 2018

Guardians of Ulthwé - Finishing Part-Painted Models

This is exciting - I am running out of half-painted models!

I have two big concerns with my miniature collection. First, about two thirds of it is unpainted and/or unbuilt. This is a daunting prospect. Second, for a very long time about 30% of my models have been in a semi-painted state.

I get bored easily. I start a lot of projects, assembling, undercoating, and even base coating models before deciding I'd prefer to be working on something else and setting them aside for later.

Later is usually a very long time coming.

So, over the years I've amassed a collection of models at various stages of painting. In my quest to have all the miniatures I own painted, that pile has been a priority.

With this post, my half-painted pile has shrunk to just two units and a character!

I didn't realise how close I was until I had to go hunting for already undercoated models to paint. Rummaging around my boxes of miniatures, I eventually found my old Eldar guardians, sprayed purple as a base coat for my old Eldar colour scheme. 

I don't plan to field guardians in my army so, rather than painting them in my new colour scheme (and to give myself a break from painting blue), I decided to make them in Craftworld Ulthwé colours.

Three days later, said unit was fully painted. For me (an infamously slow painter), it was a goddamn record.


They're not as sharp as the newer plastics, but I think overall they're still some pretty fine models that don't look out of place among the more recent sculpts.

Painting black with an airbrush was a breeze.

I started with a mix of black and German Grey (Vallejo), highlighted with German Grey, then with Pale Greyblue (Vallejo). Doing everything with the airbrush made the transition from dark to light very smooth, but they looked a little bright for my taste so I gave them a heavy wash of Nuln Oil (GW) to bring back the black.

For three days' work these guys are a complete triumph. I'm really happy with the result and am more motivated than ever to finish off the part-painted models on my table. The only question is, do I work on the character that I'm not terribly fond of, or the twenty-five skeletons that will take me an absolute age?

While I work on an answer, happy painting!

03 September 2018

Dire Avengers

I do seem to be painting a lot of blue lately.

Dire Avengers are the backbone of an Eldar aspect army and were some of the first Eldar models I ever owned. (I don't think I'm ever going to get used to calling them Aeldari or Asuryani.)

I put my Dire Avengers together a long time ago, undercoated them, and never got round to painting them. (Although I did base coat my exarch.) As I've been having a lot of success airbrushing blues I decided now was the time to change that (the unpaintedness of the Dire Avengers, not my recent success in painting blue - long may it last.)


Eldar (Aeldari) Dire Avengers


I'm pretty happy with how they look (especially the simple but effective bases) but will definitely change a few things next time round.

I'm not a fan of the GW's Gemstone Paints for painting actual gemstones. While painting them the old-fashioned way is time consuming, I think the effect is much, much better and worth the extra effort. Gemstone Paints are better reserved for things like vehicle screens or other unusual items.

I'm also disappointed with the Ceramite White (GW) I used to paint the cloth and helmets. I thought it would save a little time (because white can be so annoying to get right) but it took about as many layers to get the coverage I wanted as starting with grey would have. It doesn't flow like the other paints in GW's Base range, either - much less smooth and generally not nice to use. Next time I'll just go with my normal white recipe.

While my Craftworld colours are bone and light blue, I want to keep my a more traditional palette for my aspect warriors. (It's well-established canon that the Eldar's motto is "Fear the Rainbow".) I'm looking forward to getting some other aspects on my table and maybe take a break from blue for a while.

It does get a little repetitive.

Until then, happy painting!

22 August 2018

Even in Death, I Still Paint

I don't paint a lot of big models. Anything bigger than cavalry and I'm loath to do anything with it, but given that I own a steadily growing number of large models (including a wraithknight, a few flyers, Nagash, several other vehicles, a greater daemon - you get the idea) it's something I feel a need to work on.

So, despite my innate love of the standard sized 28mm model, I decided to break from my preference and paint an Ultramarine Dreadnought. It'd also be a good opportunity to stretch my airbrushing muscles, as I was pretty sure I could do most of it without a brush.

It's just the push-fit Assault on Black Reach model, but painted up I think he's almost as nice as the multi-part ones.


Ultramarine Dreadnought Front

Ultramarine Dreadnought Top

Ultramarine Dreadnought Back 1

Ultramarine Dreadnought Back 2

Ultramarine Dreadnought Detail

The blue was all airbrushed using three different shades of blue (I think - I honestly don't even remember which ones, just whatever seemed appropriate at the time) except for some minor edge highlighting and shading to make it pop. The metal is pretty standard (Boltgun, followed by Chainmail and Mithril (GW paints), and shaded with black and brown - although not necessarily in that order), and the little red light was one of my first times using GW's gemstone paints, which had been sitting on my painting desk for a while. By far my favourite detail, though, is the writing on the left leg - best I've ever managed.

This model was a joy to paint and I'm looking forward to getting some colour on my grey giants.

Until next time, enjoy the photos and happy painting!